Embedding YouTube Videos in WordPress: Best Practices
How to embed YouTube videos in WordPress: compare native embeds, plugins, and custom code for performance and flexibility.
TL;DR
Embedding YouTube videos in WordPress is usually better than uploading video files directly because it reduces server load, saves storage, and provides more reliable playback across devices.
Directly uploading videos to WordPress can consume server resources, reduce playback performance, and increase storage requirements
Native WordPress embedding methods, including oEmbed, block editor embeds, and builder integrations, are sufficient for most video use cases
Embedding multiple videos on a single page can affect page speed because each video adds scripts and processing overhead
Lazy loading and thoughtful video placement can help reduce the performance impact of embedded videos
YouTube plugins are best reserved for advanced requirements such as galleries, playlists, additional customization, or specialized performance controls
There are multiple methods to develop websites with embedded YouTube videos. However, each approach has a different impact on page speed, editing capabilities, and the final look of the content. In most cases, embedding a video is better than uploading it directly to the media library, especially when you care about performance, storage, and responsive playback.
This guide explores the main approaches used in WordPress website development to embed YouTube videos, with practical considerations around lazy loading, customization trade-offs, plugin usage, and overall site performance.
Benefits of Adding Videos to Your Page
To start, let’s mention a few main advantages of inserting video content on websites:
The page becomes more interactive and engaging
You can target both people who prefer reading and those who love watching videos to get information
As visitors spend more time on your website, your SEO rankings may improve
Adding high-quality background music can also enhance the video content, and you can easily download free background music from resources like Videvo.
WordPress users know that the Media Library is a tool that allows them to upload images and videos. Then, the question is, ‘Why should you embed the video instead of simply uploading it to the Media Library and adding it to the page or post?’
Why Shouldn’t You Upload Videos to WordPress?
Let’s look at the main reasons why you should not add videos to WordPress directly.
1. Finite Server Resources
Many hosting plans have shared server resources used every time visitors play videos on the website. The more videos and simultaneous viewers you have, the more server resources you need. Low bandwidth may result in making your entire site slow.
2. Low Video Speed
If your server resources are limited, visitors may also experience slow video playback and video freezing.
3. Limited File Size and Storage
Often, WordPress and hosting providers limit the size of files you can upload. Although you can increase the WordPress upload limit and upload your file, the chances are you can run out of available storage space. To mitigate this issue, consider using a video cutter to reduce the file size before uploading.
4. Unadjusted Video Quality
The user can choose preferred video quality based on a better or worse Internet connection. Laptops usually require videos of higher quality, which may be a problem for mobile devices. If you want to upload videos directly to WordPress, you’ll need different versions separately with higher and lower resolutions. This is not very convenient, and it takes valuable space.
What Does Embedding a Video Mean?
Embedding a video means that this video will be hosted on another location, different from your site, and ‘borrowed’ when your website visitors want to play it.
If you have a YouTube channel and add videos there, embedding videos on your website gives the following benefits compared to uploading:
save your server’s resources and prevent slow website loading
guarantee better video loading (uploaded videos are more likely to freeze than embedded ones)
save server storage
make your video responsive and available for users’ different devices.
WordPress development beyond basic content edits.
Custom functionality and production-ready execution.
How to Embed YouTube Videos in WordPress: Simplest Ways
There are several ways of adding YouTube videos to WordPress websites. These methods are pretty straightforward, so you can choose the one that works best for you, even if you are a beginner. You have to know
where you want to add a video (page, blog post, sidebar, etc.)
what WordPress editor you are using to embed the video
Here, we’ll provide instructions on how to add videos to WordPress posts and pages if you are using a classic WordPress editor and Elementor.
oEmbed Technology
oEmbed is an API (Application Programming Interface) that allows an embedded representation of a URL on third-party sites. In other words, YouTube as a video provider lets WordPress, a consumer, display the video on the website via oEmbed.
Starting with WordPress 2.9, embedding videos became easy and user-friendly.
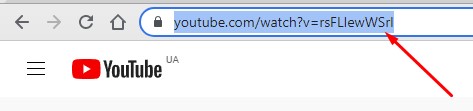
To add a video, you need to know its URL. You can copy the address directly from your browser.
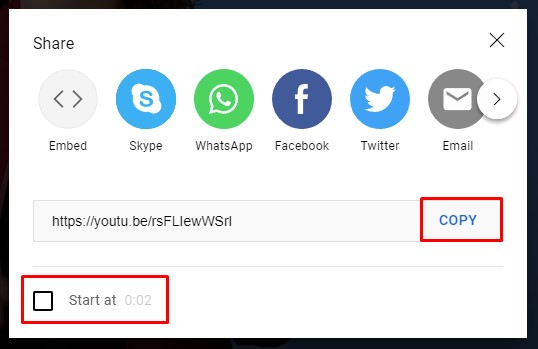
Alternatively, you can use the ‘Share’ button under the video.
The advantage of this method is the possibility to select the time when the video should start. You have to choose the necessary time, tick the box, and copy the URL.
Adding YouTube Videos to Posts: Classic Editor
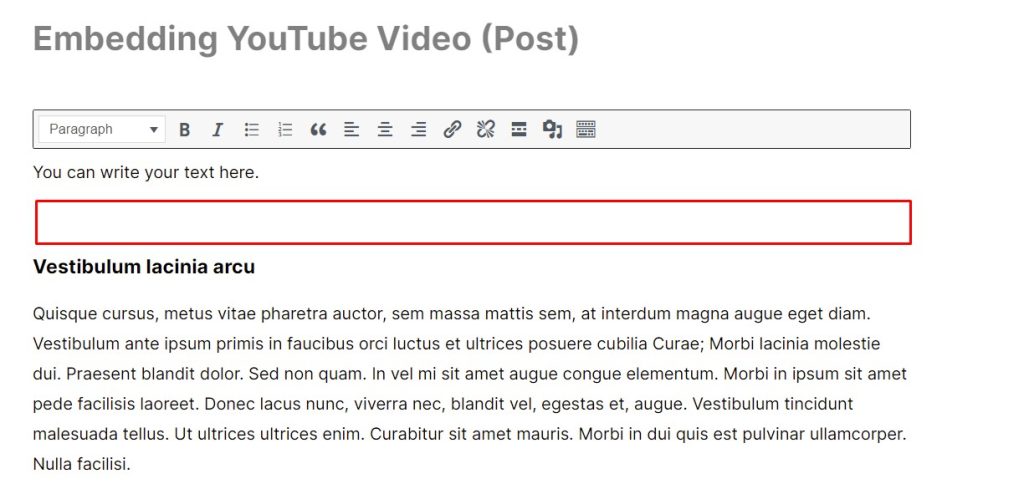
If you are using the Classic Editor, you have to open the post and choose the content block where you want to add the YouTube video.
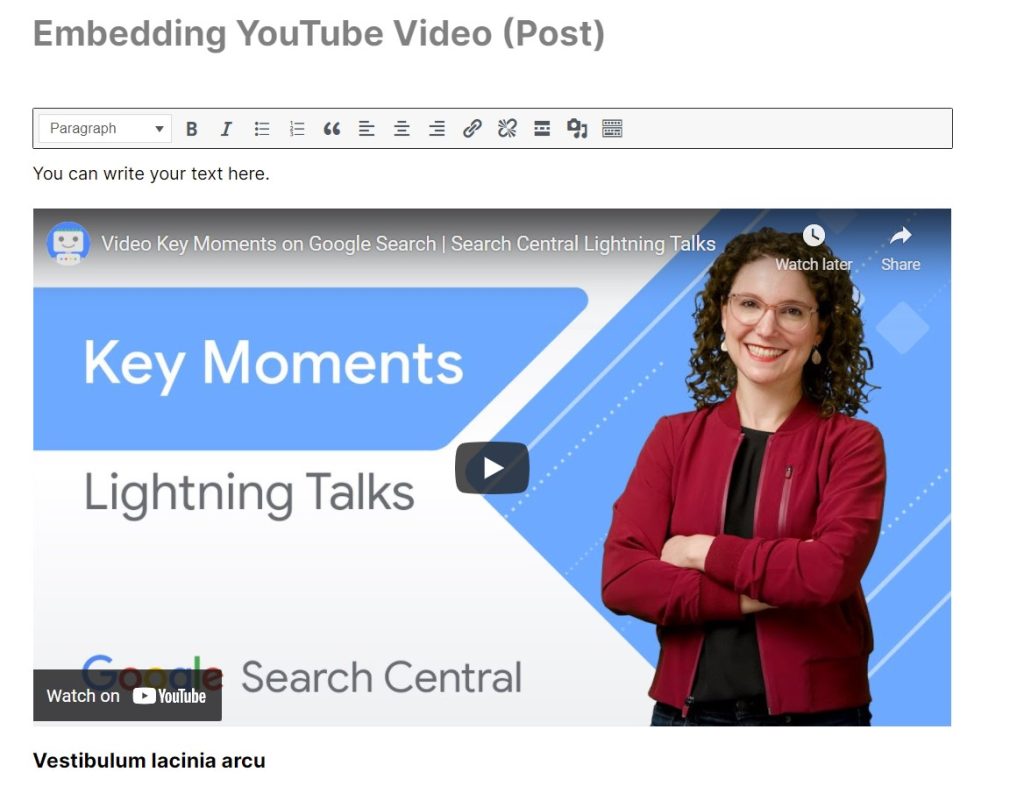
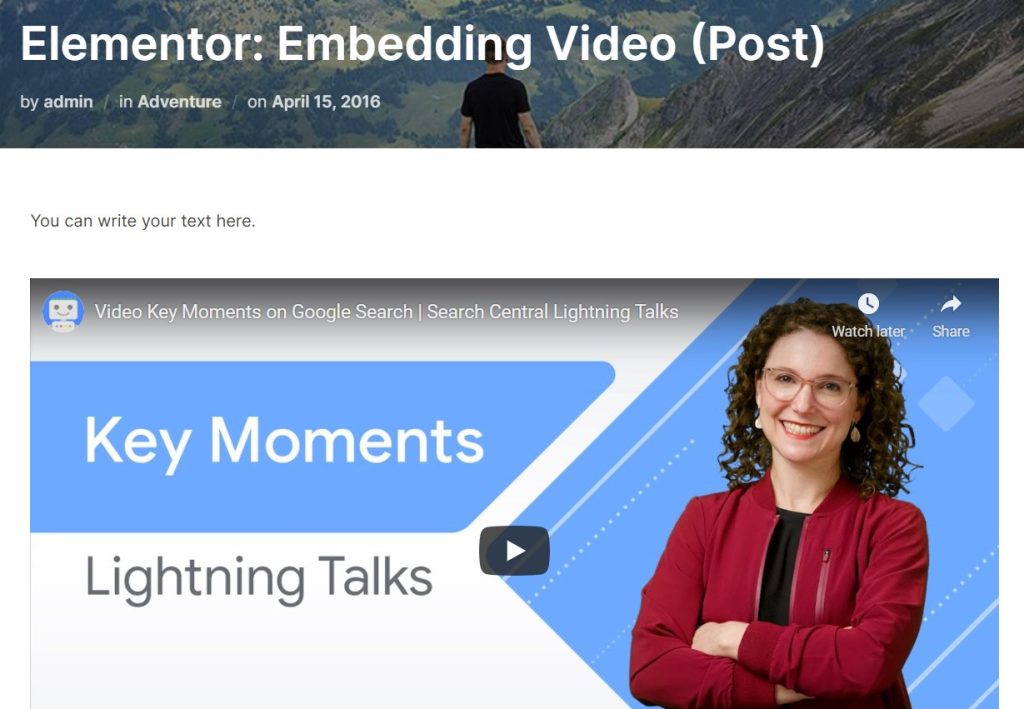
When you insert the video URL in the content area, WordPress does the magic and automatically transforms the URL into the video preview.
Then, you can preview the changes and update your post.
Inserting Videos Using Blocks (Block Editor)
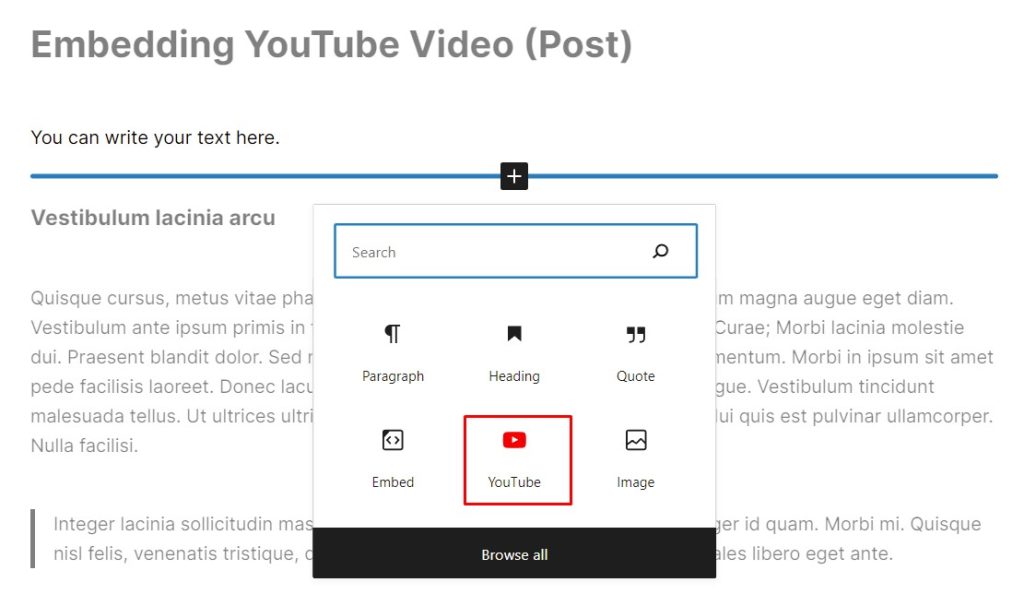
If you prefer to edit posts using blocks, you should use YouTube Embed Block. First, you should add a block where you want the video to appear.
When you click the ‘Add block’ button, you’ll see available blocks. YouTube is one of the most popular, so you will likely see it in the suggested blocks. If not, use the search.
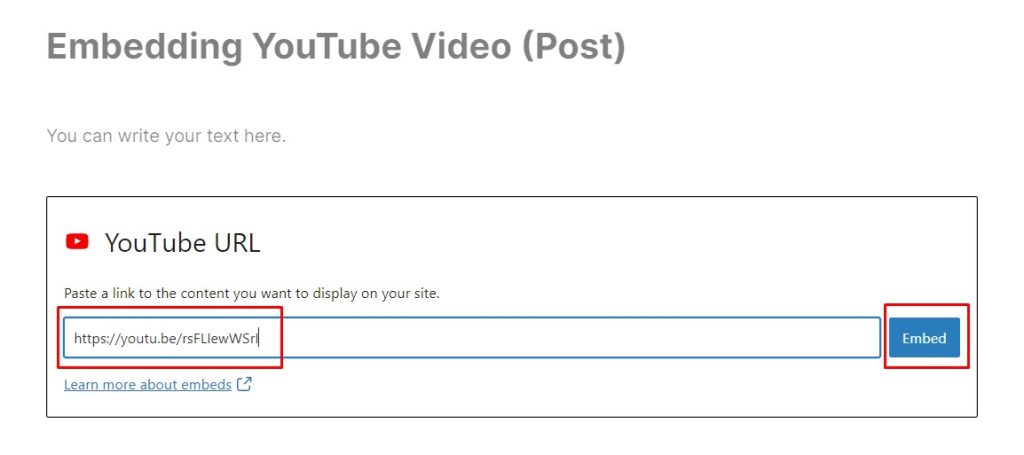
Second, you should add the video URL to the block and press ‘Embed’.
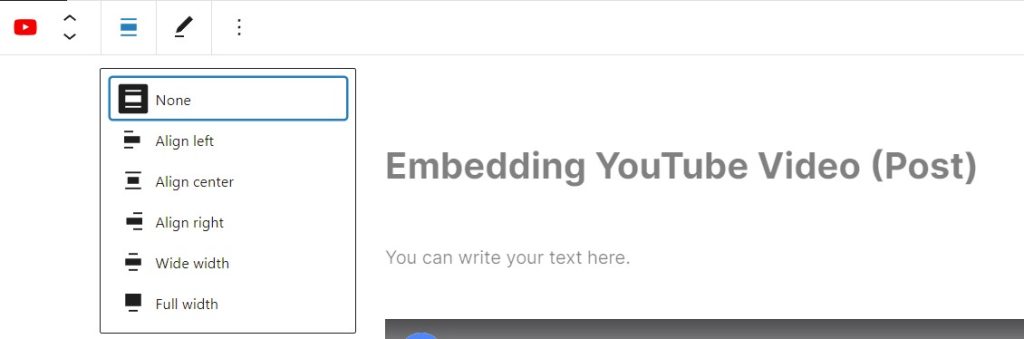
Also, the Block Editor allows you to adjust video alignment and move the block down or up (if you decide to change its position).
Adding YouTube Videos to Posts: Elementor
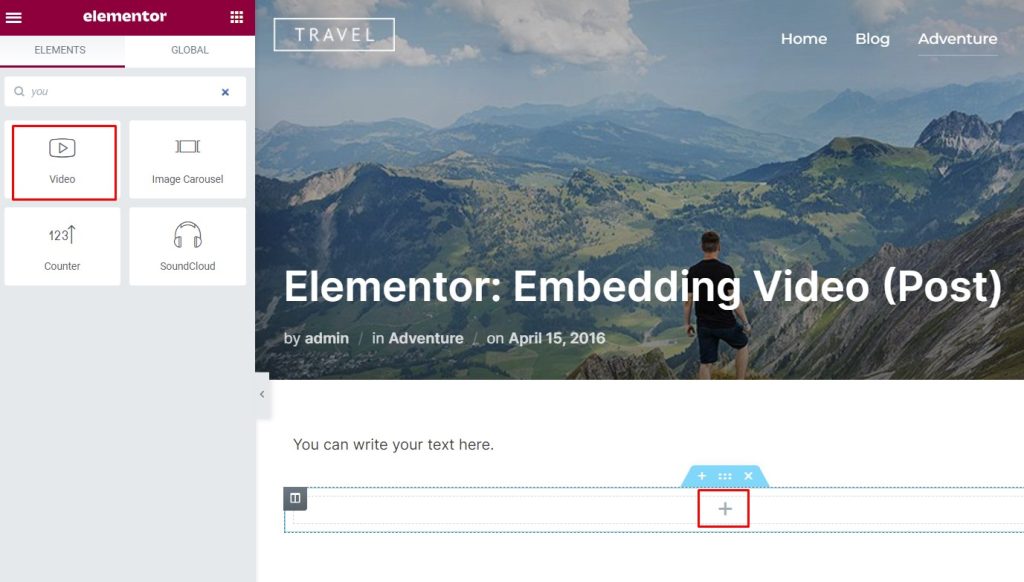
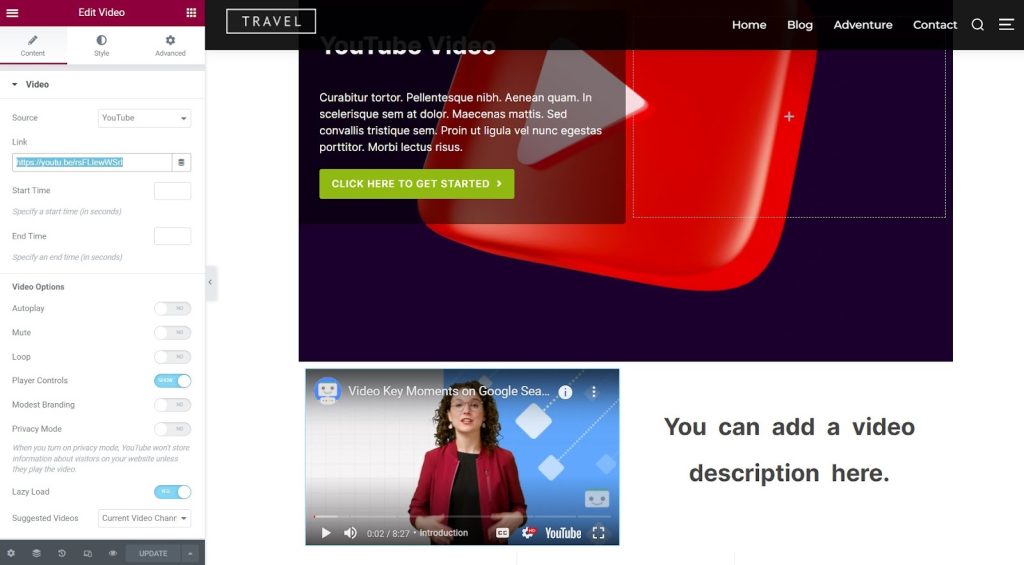
If you prefer optimizing your WordPress website with Elementor, you have to use the Video widget. Add the section and choose the Video widget. You can search for ‘YouTube’ or ‘Video’ to find it faster.
After you drag the widget to the section, you’ll see numerous settings.
You should add the link to the video you want to play. Then, you can adjust the start and end time, autoplay, muting, player controls, etc.
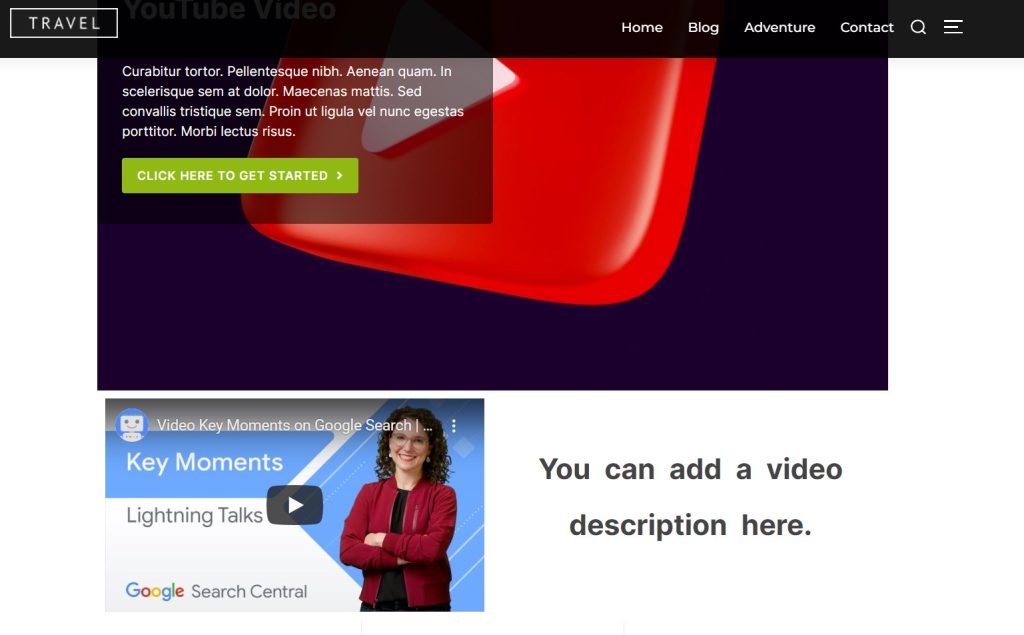
After choosing the necessary settings, you can preview and update your post.
Adding Videos to Pages: Elementor
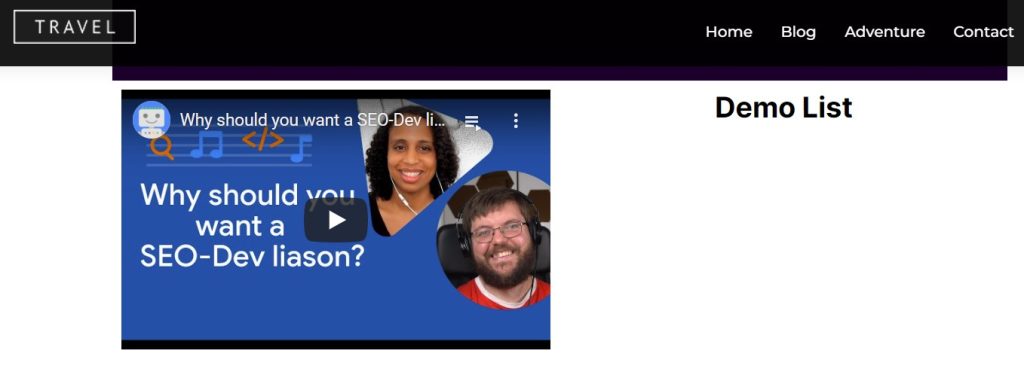
Similar to inserting videos into Posts, you have to use the Video widget to add a YouTube video to the page in Elementor. Create a section, add the video widget, insert the URL, and adjust the settings.
Afterward, you can preview and update/publish the page.
Embedding Videos via Code (Elementor)
Another way to add a YouTube video to the page is by using a code. Although it can sound scary for those who don’t have any coding skills, it’s not that bad.
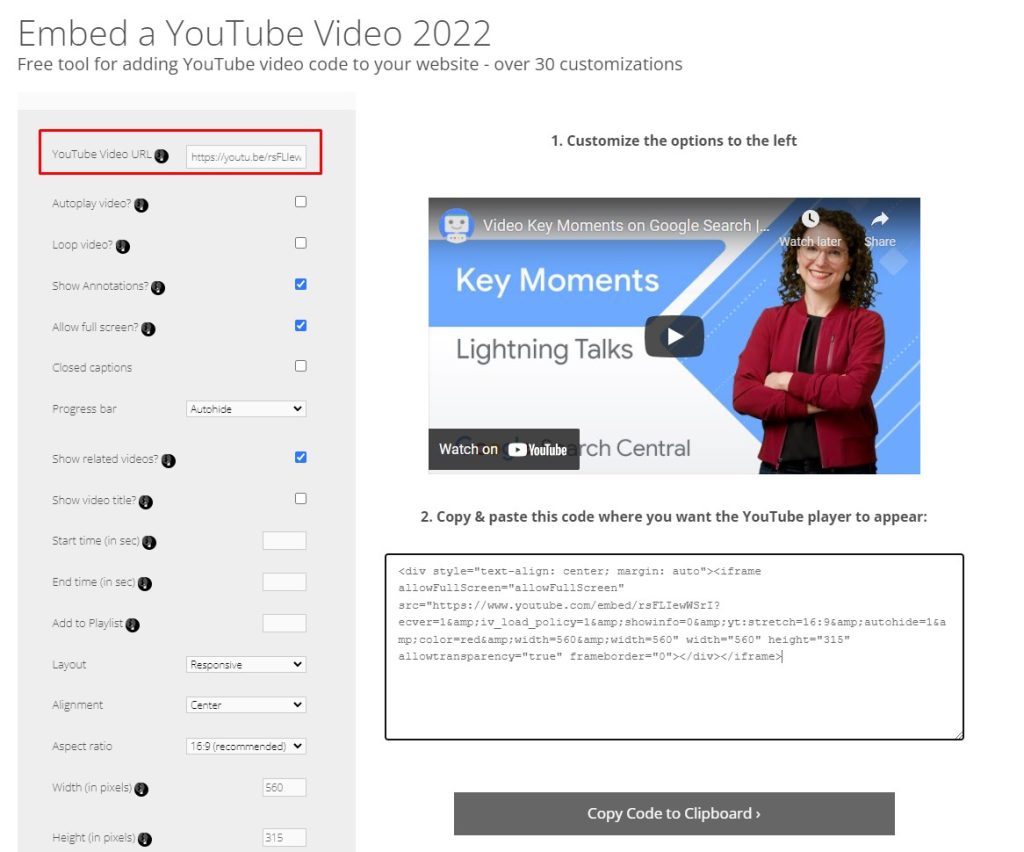
Firstly, Elementor widgets are easy to use when you want to insert a custom code. Secondly, there are different tools that can help you create an HTML code for the video with the desired settings. YouTube Embed Player Customizer is one of them.
When you open the YouTube Embed Player Customizer, you should paste the URL of the video you wish to add.
Then, on the left sidebar, you can adjust the settings. It’s possible to set video width, height, autoplay, looping, annotations, start and end time, title, alignment, layout, etc.
Afterward, you should copy the HTML code to the clipboard.
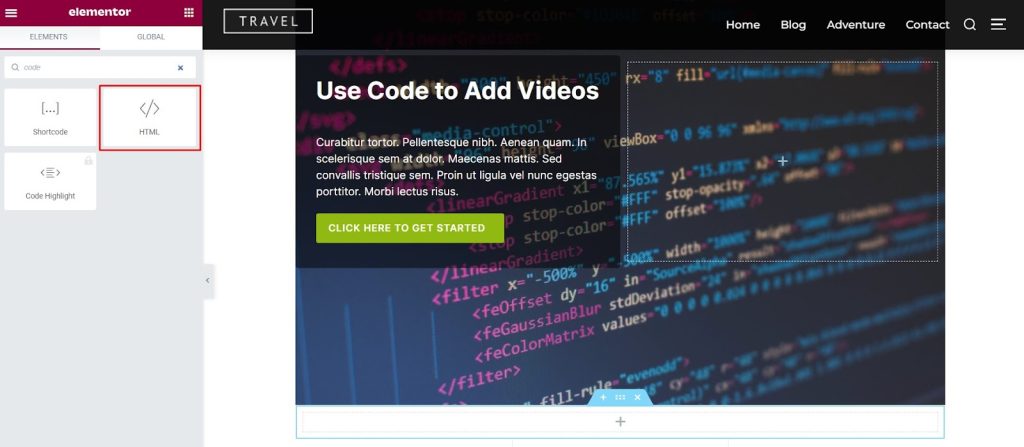
When you open a page in Elementor, you should create a section and add an HTML widget to it.
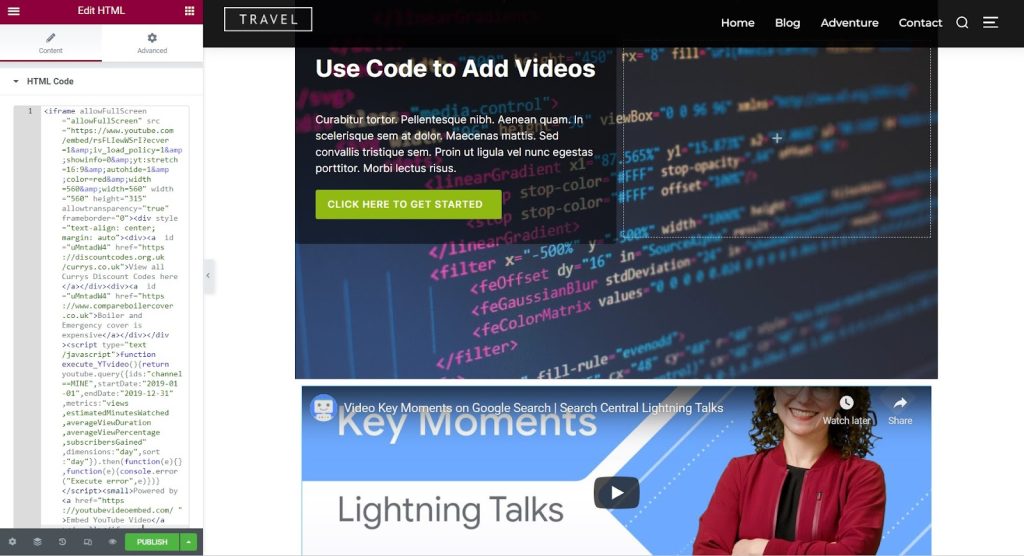
Then, insert the code you copied into the HTML Code field on the left.
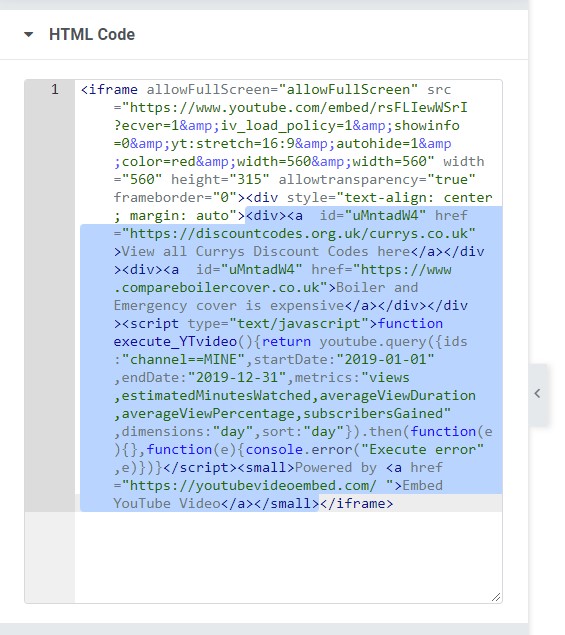
Probably, you will notice that the added code is longer than the one displayed on the YouTube Embed Player Customizer. As this is a free tool, extra code is added when copying the code to the clipboard.
You may compare the code displayed on the website with the one you inserted and delete the extra coding.
After that, remember to preview and publish/update your page.
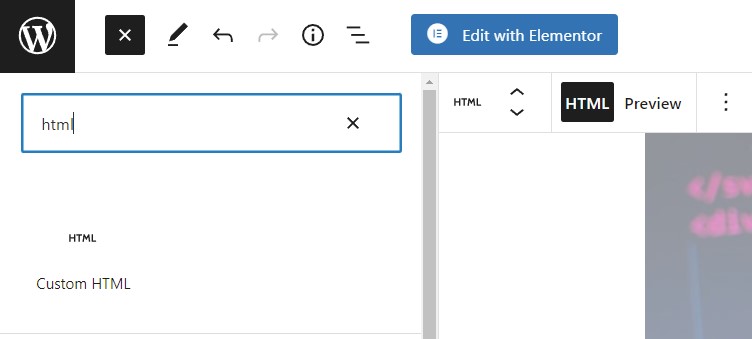
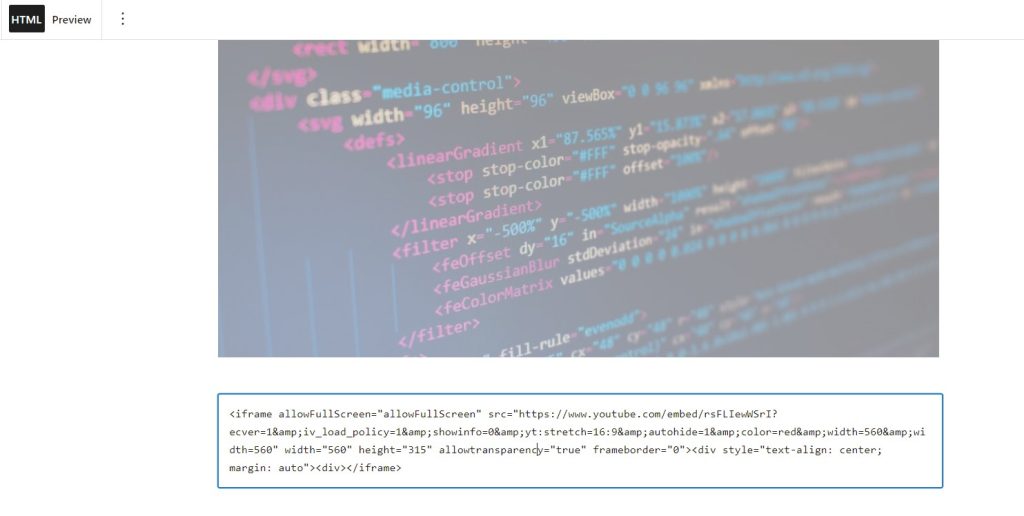
The process of adding a custom HTML code to embed a video with the Block Editor is similar. You should find a Custom HTML block when editing the page.
After adding the block, insert the code you copied.
You can preview the changes and update/publish the page.
Adding Videos to the Sidebar
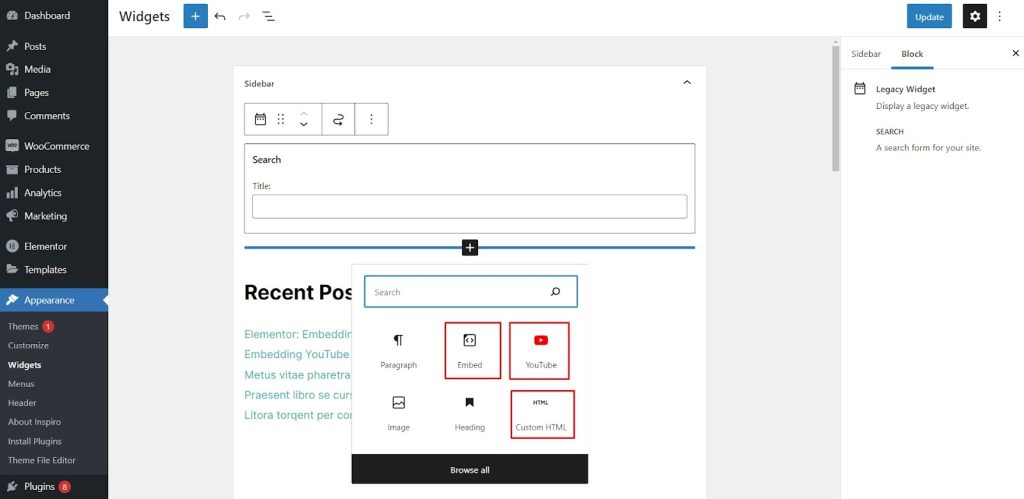
To customize the sidebar, you should open the Widgets submenu in the Appearance on your WordPress dashboard.
If you want to add a YouTube video to your sidebar, you can use the following widgets:
Embed
YouTube (Video)
Custom HTML
With the Embed and YouTube widgets, you should use the YouTube video URL. The Custom HTML lets you apply the adjusted code.
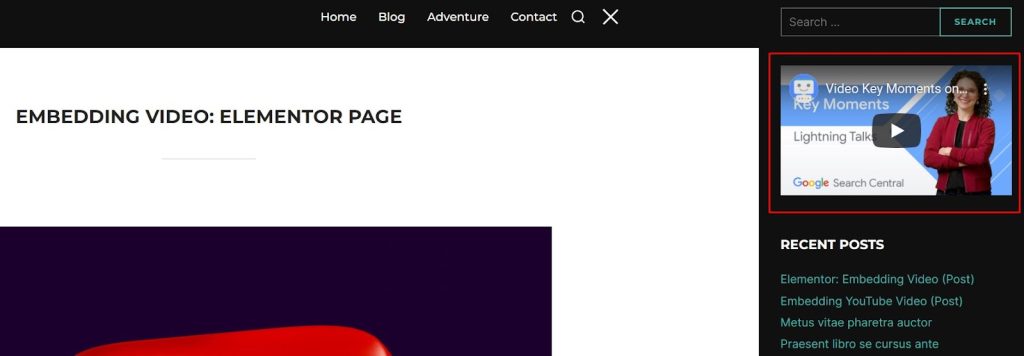
After adding a block and inserting the URL or code, update your widgets. You’ll see the video on your pages’ sidebar.
Pay attention to the fact that Post Sidebar is different from the main Sidebar. If necessary, you can add videos to the Post Sidebar in the same way.
How Embedding Videos Affects Page Loading Time
Embedding has less impact than uploading content to media as it consumes fewer server resources. However, despite external video storage, embedding still adds third-party scripts and code to the website, which increases processing load.
As a result, when too many videos are embedded on a single page, its speed can suffer considerably. Each video creates more overhead, especially when it’s long or uses complex players. Therefore, we recommend carefully checking every video to make sure it doesn’t create bottlenecks.
One of the best solutions we use at DevGetDone to mitigate this impact is lazy loading. It instructs users’ browsers to load only the part of the screen they actually see. Other page elements should load later when the user scrolls to them. In this case, the embedded video will not play if the person scrolls past it.
Placement also matters. It’s better to place large media elements, including videos, closer to the bottom so they do not block the rendering of critical content.
Common YouTube Embedding Mistakes on WordPress Websites
Embedding is a recommended and reliable approach, but many still make mistakes when using it. The most typical mistakes are adding too many videos to one page or loading several embeds above the fold. It’s also a bad idea to use plugins instead of native blocks or adding custom embed code when you don’t fully understand what the extra script brings.
On production websites, video placement is closely related to performance, layout, and user intent. With the right use, a video can improve engagement. When a page is overloaded with embeds, it can harm speed and user experience.
Plugins for Embedding YouTube Videos
WordPress plugins are an alternative way to embed YouTube videos into your post or page. You can use plugins if you want to get additional customization options. Also, plugins can assist in creating video galleries (if you need this function).
Overall, it’s better to use native WordPress or builder features and consider plugins only when you need playlists, galleries, advanced lazy loading, schema controls, or heavier customization. Before installing a plugin, make sure WordPress’s native functionality cannot handle this task. It will prevent plugin overbloat and make their use truly justified.
Here are some of the top plugins for Embedding YouTube Videos you can use:
YouTube Embed
YouTube Embed by David Artiss is a free plugin that lets you effectively add YouTube videos to your site. The plugin works with WordPress 4.6 or higher, and its latest version has been tested up to 5.9.2. This plugin has several great features that are worth mentioning.
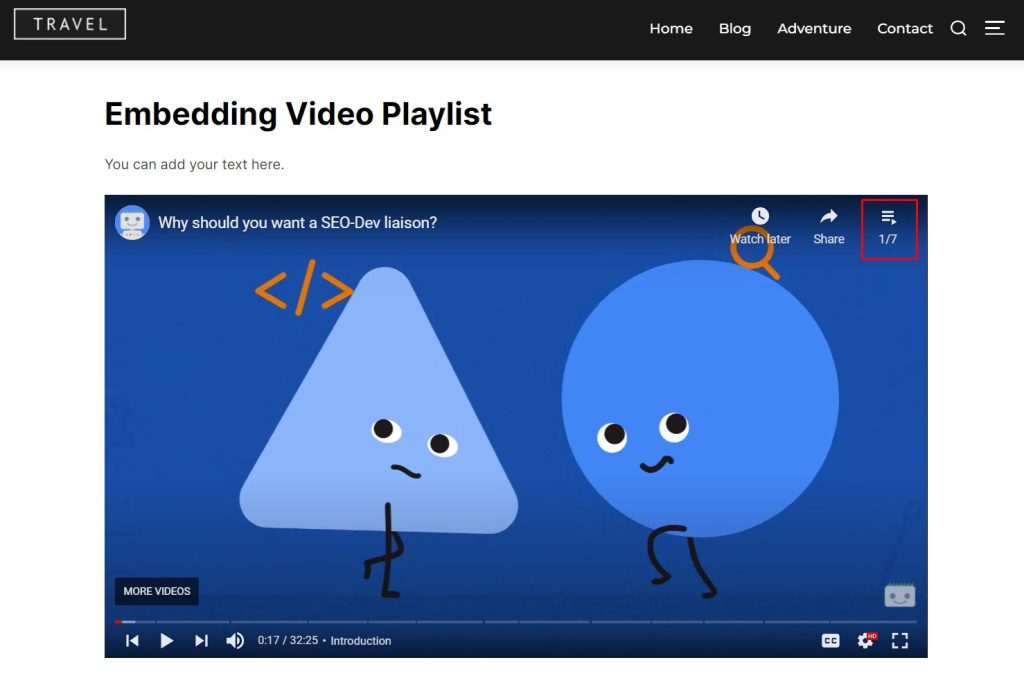
You can create video playlists and add them to your posts, pages, or sidebars.
The plugin has dynamic video sizing for responsive sites.
It’s possible to create multiple profiles and use them for better customization options.
There is an opportunity to set video sizes, autoplay, looping, video annotation and caption options.
You may display related videos from the same or different channels.
There is an option to allow rich metadata to be added to code, so that you can improve the way search engines ‘see’ your videos.
After installing and activating the plugin, you may set profiles and create video lists. Then, using shortcodes, you can add single videos or video lists where you wish.
Plugin developers provide a detailed description of all the features and peculiarities on the plugin WordPress page, so you can read and take advantage of the numerous functions available.
Embed Plus Plugin for YouTube
Embed Plus Plugin for YouTube is suitable for WordPress 4.5 or higher. Its latest updates (March 2022) have been tested up to WordPress 5.9.2. With more than 200.000 active installations, this is one of the most popular WordPress plugins for adding a video. Let’s see what distinguishes this plugin and makes it so popular.
First, it’s necessary to mention that the plugin is user-friendly. After installing and activating it, you’ll see a setup wizard guiding you, so you can select the necessary options.
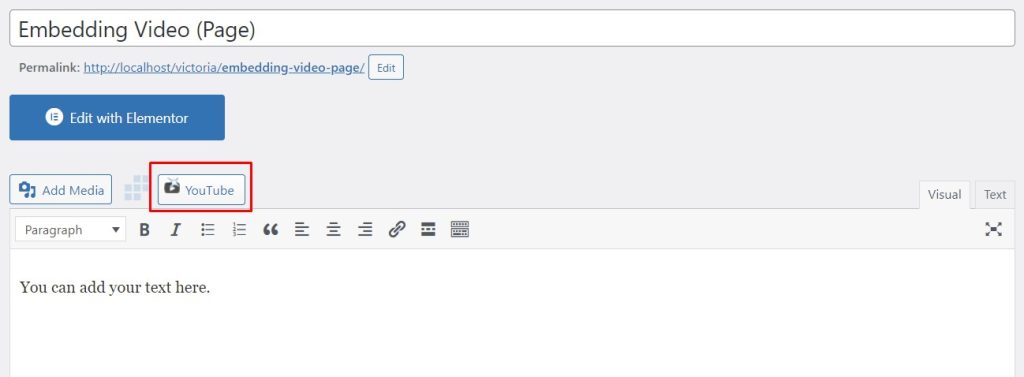
Second, this plugin works well with the default WordPress editor. You’ll see a YouTube button while editing your post or page.
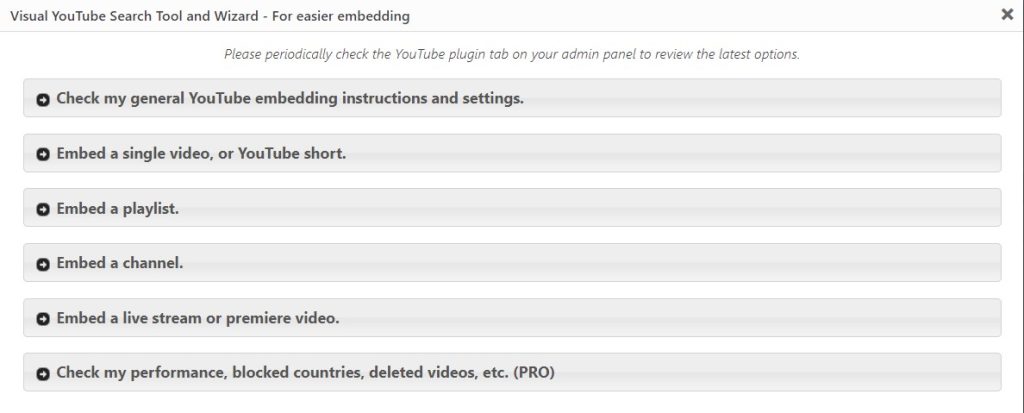
When you click the button, you’ll see various options of what it’s possible to embed (a single video, a playlist, a channel, or a live stream).
After adding the URL to the wizard, you can copy the code (if you need it) or simply press the ‘Insert’ button to embed the desired video. Afterward, you can preview and update/publish the page.
This plugin has a free and pro version. The free version offers plenty of customization options some of which are:
autoplay, annotations, looping, modest branding, related videos, fullscreen button, width and height, responsive video sizing, and many more.
The pro versions can also provide:
full visual customization wizard
advanced gallery customization (list and slider layouts, popup/lightbox player, wizard sizing, thumbnail hiding for text only paging, etc.)
embedded caching to speed up your page loads
eye-catching special, lazy-loading effects
included the YouTube live chatbox as part of each live stream embed
automatic Google, Bing, and Yahoo-friendly video SEO markup
mobile compatibility check
analytics dashboard to analyze visitors’ watching behavior
deleted video alerts
Video Player for YouTube
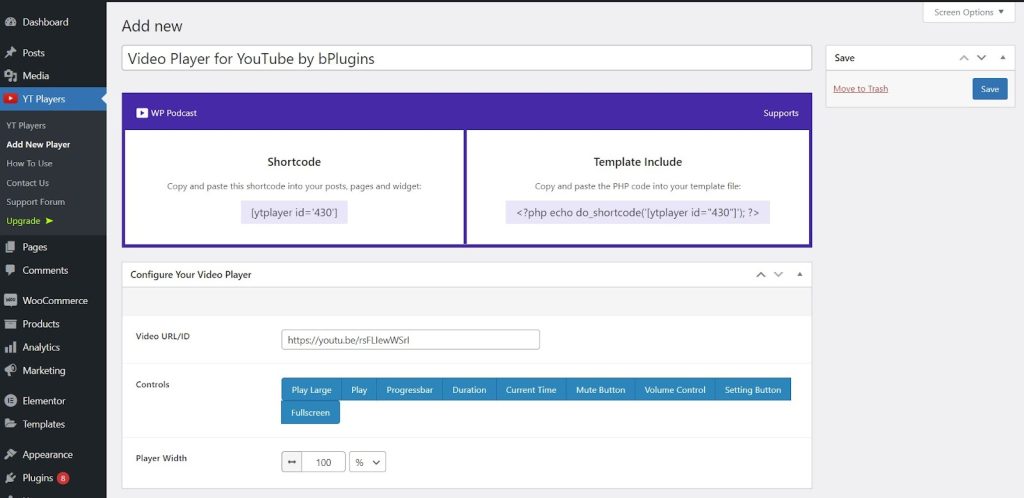
Video Player for YouTube by bPlugins is suitable for WordPress 3.0 or higher and has been tested up to 5.9.2. This plugin lets you add videos via shortcodes.
After installing and activating the plugin, you can create video players for each video you want to add. Then, you’ll see a shortcode that you can apply where necessary.
The free plugin version lets you enable/disable such controls as full-screen playing, progress bar, duration, volume control, mute button, etc.
With the Pro version, you’ll also get:
control over every button and element of the player
color customization options,
enabling/disabling the context menu to prevent download
fast forward, rewind, and restart buttons
Conclusion: How to Add Video to WordPress
While it’s possible to upload video files to your WordPress media library and add them without embedding, this is not a perfect solution. It’s better to use third-party sources, such as YouTube, to share videos by embedding them.
The best way to embed YouTube videos in WordPress depends on how much control you actually need. Native embedding using the editor or builder is suitable for most cases. More advanced approaches, such as plugins or using HTML code, are justified for additional customization, galleries, or performance tuning.
The simpler the implementation, the better. We recommend using embedding instead of direct uploads and avoiding unnecessary plugins. You should also remember that video placement affects overall performance.
Get more from WordPress before rebuilding.
Production-ready development that improves speed, UX, and scalability.