
- Case study, WordPress development
- 2 min read
Subscription website development for ad ideas and campaign assets
Discover how subscription website development helps deliver digital content, manage memberships, and create recurring revenue streams.
Do you have a Figma design and wonder how to convert it into a functional WordPress website? Read this post to discover three possible methods to approach this task, including their pros, cons, and challenges.

TL;DR
Figma to WordPress conversion can be done manually, with conversion plugins, or professionally developed, with the best approach depending on design complexity, quality, and available expertise.
Are you seeking effective ways to convert your Figma designs into a fully functional WordPress website? You’re in the right place.
In this post, we’ll delve into three essential methods for Figma to WordPress conversion. These include manual conversion the DIY way, using a specialized Figma to WordPress plugin, and employing the services of a professional WordPress developer. Each method has its own set of pros and cons, which we’ll discuss in detail.
Now, without further ado, let’s dive in!


This method is not for the faint-hearted as it requires a robust understanding of HTML, CSS, and PHP coding languages. However, the reward is worth the effort – it provides you with an unrivaled opportunity to customize each aspect of your design elements, resulting in complete control over how your final product will look and function.
The procedure involves converting your Figma design first into HTML/CSS and subsequently into WordPress.

The first step in this process is to export your Figma design assets, such as logos and images, that you’re going to use in the HTML/CSS code afterward. You can do that manually, exporting each asset one by one. Refer to this page for detailed instructions on this procedure.
There’s an easier way, though. It allows you not only to export your assets but also jump straight to the next step and export your design into HTML/CSS code. This is switching to the Figma Dev Mode. Here, you can add an export configuration and you’re good to go.
While Dev Mode requires a paid seat starting January 31, 2024, it’s a very convenient way to work with Figma designs that can save you a lot of time and effort down the line.
You can also take advantage of numerous Figma plugins such as Anima, which also enable you to create the HTML/CSS code of your design automatically.

Note, however, that the code produced by such tools is far from perfect. It often lacks compliance with accessibility standards like ADA, is poor from an SEO perspective, not pixel-perfect, and contains additional plugin-specific instructions that can adversely affect your website performance.
If you have applied neither Dev Mode nor a Figma to HTML plugin on the first step, then you need to write HTML/CSS code by hand. For this purpose, you can use a code editor, with Visual Studio Code being probably the most popular option. Looking at the Figma design and using the assets you have previously exported, create the appropriate HTML/CSS files and test them.
After your HTML files are ready and tested, you’ll need to convert them into a WordPress theme. This critical step involves integrating PHP code to interact with the WordPress content management system, allowing your design to come alive on the platform.
Here are the main steps:
Install a local development environment on your computer, like XAMPP or MAMP. This lets you run a local WordPress installation, enabling you to work on your WordPress theme without impacting your live website.

Within your WordPress installation, navigate to “wp-content/themes” and create a new folder dedicated to your theme. It is advisable to name it something relevant to your design.

Open each of your HTML files in your preferred code editor and convert them into PHP files. Replace static content with appropriate WordPress template tags and functions.
If your design includes custom CSS stylesheets or JavaScript files, create the necessary files within your theme folder. Then, enqueue them using WordPress functions like wp_enqueue_style() and wp_enqueue_script() in the appropriate theme files.
If your HTML design includes dynamic features like blog posts, comments, or menus, implement the corresponding WordPress functionalities. Use WordPress functions, hooks, and plugins to incorporate these features into your theme.
After completing the integration, thoroughly test your WordPress theme. Ensure that all elements, styles, and functionalities work correctly. Test the theme on different devices and browsers to ensure responsiveness and consistency.
When you’re content with the final look and feel of your theme, proceed to compact the theme folder into a ZIP file. Following this, upload the zipped file to your live WordPress website. To activate your freshly uploaded theme, head over to the WordPress dashboard and select Appearance -> Themes, then click on your new theme to activate it.
As with any method or process, manual conversion has its benefits and drawbacks:
Pros
Cons
If manual conversion seems too complicated, let’s discuss another method to convert Figma designs to WordPress websites: using plugins.
Get a high-quality, accessible, and fully responsive website fast.
Order now
There are numerous applications that convert Figma designs into an HTML code package automatically, which can then be imported into WordPress. The capabilities and customization scope of these apps may differ, so which one you choose is a matter of personal preference.
In this guide, we’ll specifically spotlight two solutions – Yatako and UiChemy – to give you a general idea of what you can do with tools like these.

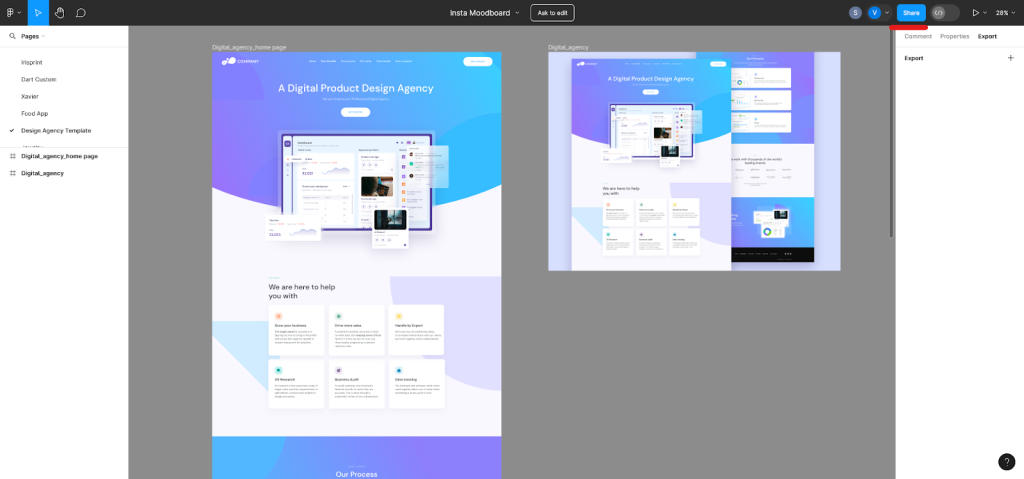
Yotako is a Figma plugin that transforms your design into a file package and directly imports it into WordPress.
Getting started with Yotako involves choosing the artboard you wish to convert. You’ll be prompted to provide the specific Figma URL of the selected artboard. To do this, click on Share at the top right corner of your screen and then hit the Copy link button. With the URL copied, you can now return to Yotako and paste it.

Once Yotako has the URL, it’s all set to start. It automatically selects your first artboard based on the provided link, although you have the option to add more pages if needed. When adding extra pages, Yotako will ask you to specify the type of WordPress page you intend to create. Your options include a Posts page, suitable for a blog-style layout, or a Normal page, perfect for pages without post functionality.
As part of its advanced features, Yotako incorporates AI technology. The AI attempts to identify interactive elements within your design. However, if you’re uncomfortable with AI performing this task, Yotako offers a manual alternative. For example, you can instruct Yotako on how to establish page hierarchy by selecting ‘Sidebar’ for the Sidebar section.
When all your pages are added and set up, you’re ready to move on to the final step — creating your WordPress site. By clicking Create, Yotako begins the conversion process, transforming your files into WordPress files. These files are then uploaded to a temporary server, where you can view your entire project interactively.
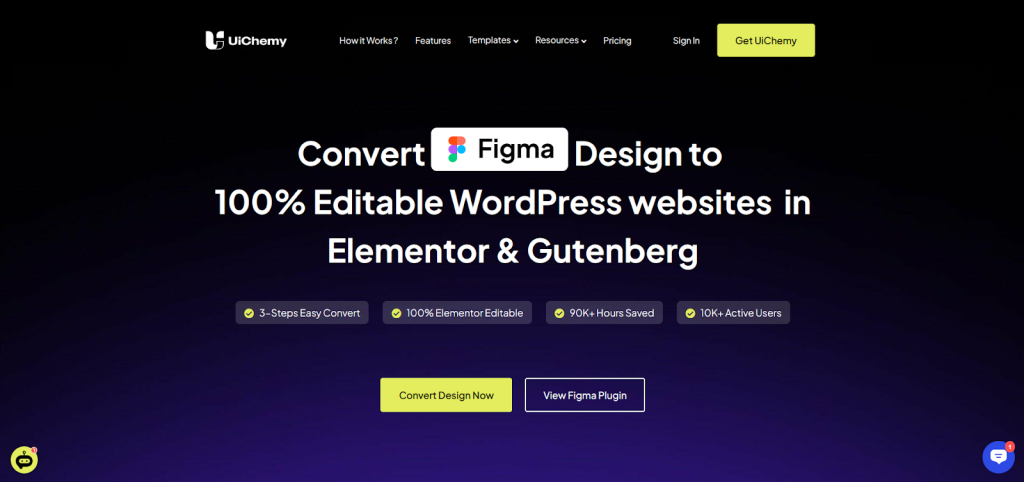
The UiChemy Figma Plugin is a tool that enables the conversion of your Figma designs into WordPress websites, using the Elementor page builder or Gutenberg.
To convert your Figma design into a WordPress website with UiChemy, follow these basic steps:
Import your Figma design into UiChemy and then export it to Elementor by doing the following:

Once the export process is finished, you can edit your design within Elementor. This page builder provides a drag-and-drop editor that you can use to modify your website visually.
To start editing your website, simply click on the section or element you want to alter. Use the varied editing tools and options within Elementor to make the necessary modifications.
When you’re content with your changes, preview your website to evaluate its look on different devices, including desktops, tablets, and mobile phones. Make further tweaks as needed.
When your website is ready to go live, the final step is to hit the Publish button within Elementor. This will make your website live and available to your audience. Your Figma design has now been transformed into a WordPress website.
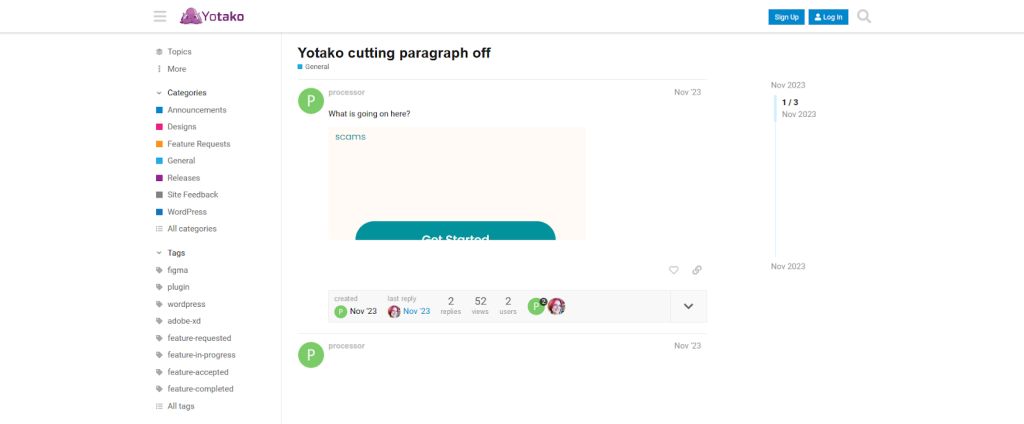
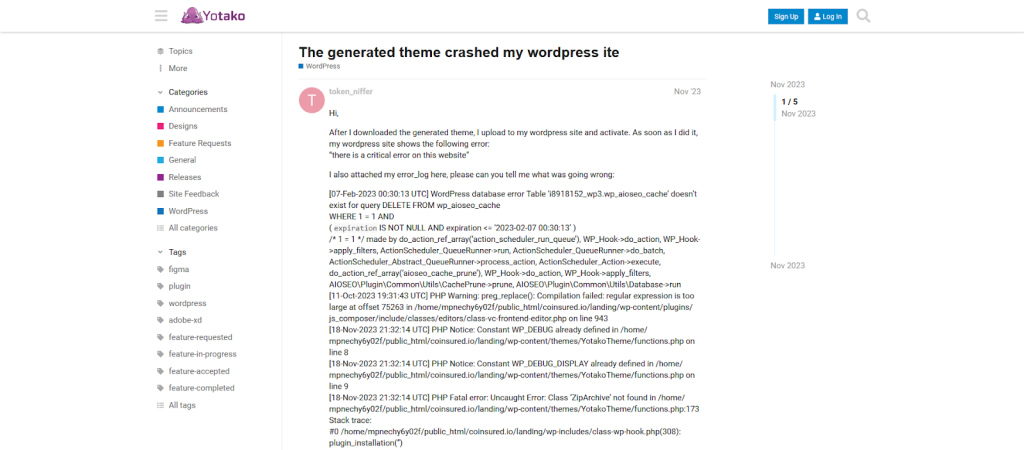
Like most automation tools, Yotako and UiChemy are not devoid of drawbacks. For example Yotako’s community page contains a number of complaints by users, from minor issues such as cutting content off to serious ones like the generated theme crashing a website altogether.
What’s worse, the customer support of many companies that develop those plugins is typically excruciatingly slow in response to customers’ issues. Sometimes, you may have to wait for weeks on end for your problem to be considered let alone resolved. This is a serious issue, especially if this is your business website that brings you “bread and butter.”
Another drawback of Figma to WordPress plugins is that most of them are premium solutions, with many offering very steep prices for their most critically important features. For instance, if you want to use Yotako, you may have to pay as much as $299 for their annual Unlimited design plan.
Wrapping up our brief overview of Figma to WordPress plugins, here are their principal strengths and weaknesses:
Pros
Cons
Therefore, if you have a unique, intricate design with interactive elements and animations, building a WordPress website from scratch employing professional services is a much safer and less troublesome option than using a plugin.
This is the third, and definitely the most efficient, way to convert Figma designs into WordPress websites that we’re going to discuss.
Professional WordPress developers effectively surpass the limitations of the previous two methods. Unlike the DIY manual conversion method, you don’t need to acquire coding knowledge or spend countless hours trying to perfect your WordPress website.
And unlike plugins, a professional service can handle complex designs without compromising on functionality or aesthetics. They employ the best Figma to WordPress conversion practices to ensure a high fidelity translation of your design to WordPress, creating a seamless transition between the two platforms.
Pros
Cons
Using the services of a professional WordPress developer is not just about getting the job done; it’s about achieving the best possible result. It’s about bringing your Figma design to life in the form of a functional, attractive WordPress website.
So, if you’re looking for efficiency and quality in your Figma to WordPress conversion, a professional WordPress development service should be your go-to choice.
Pixel-perfect builds with scalable frontend architecture and cleaner performance.
Order now
We’ve explored three key methods for converting Figma designs into WordPress websites. Each approach has its place depending on your specific needs and expertise.
The first method involves doing it yourself, which allows for full customization but can be time-consuming and challenging to learn, with potential for errors.
The second method is using tools like Yotako and UiChemy that simplify the process, but they may not handle complex designs well and could restrict your choices.
The third method is engaging a professional WordPress service, which can provide a smooth process, high-quality results, and time efficiency. This method could be suitable if you prioritize quality and speed.
With that in mind, if you find yourself needing assistance in transforming your Figma designs into a WordPress website, our team is always at your service. We boast unrivaled experience in working with all types of designs, including Figma, XD, PSD, Ai, and many others, converting them into visually stunning and high-performing WordPress themes.
Feel free to reach out to us for any design conversion needs. We’re here to help you bring your vision to life.
For a complex custom design, manual professional development is usually the safest method, not automated plugin conversion. Complex Figma files often include custom breakpoints, unusual layouts, animations, reusable components, forms, CMS logic, integrations, and content editing rules that a plugin may not interpret correctly.
Manual conversion gives developers control over theme structure, responsive behavior, WordPress template logic, performance, accessibility, and QA. That matters when the site has to be maintained after launch, not only look similar on one screen size.
For agency client work, the practical question is not “Can the design be converted?” but “Will the result survive revisions, QA, browser testing, content updates, and future campaign changes?” For that kind of project, a scoped Figma to WordPress conversion handled by WordPress developers is usually the better route.
A plugin can be enough for simple, low-risk pages where the design is straightforward, the layout is close to common sections, and minor visual differences are acceptable. It is also more realistic if the team is comfortable cleaning up the result in Elementor, Gutenberg, or another supported builder.
It becomes risky when:
The hidden cost is cleanup. A plugin may reduce the first conversion step, then create extra QA, CSS, responsive, and code-maintenance work later.
No, not for a production website. It is realistic as a learning exercise, but WordPress theme development requires more than exporting assets and writing static HTML/CSS. The site has to be turned into templates, connected to WordPress functions, enqueue scripts and styles, handle menus, posts, forms, dynamic content, and be tested across devices.
A non-developer can sometimes build a simple page with a page builder, but that is not the same as manual conversion. The hard part is not copying the design visually. The hard part is making the site editable, responsive, performant, secure, and maintainable.
For a hobby project, manual learning is fine. For a client or business site, the risk of rework is high.
A lot of failures come from treating conversion as a visual task only. The design may look acceptable on desktop but break on mobile, lose spacing consistency, load slowly, or become difficult for marketers to edit.
Common issues include:
In agency delivery, these problems are rarely “small fixes.” They can turn into scope disputes, QA loops, delayed approvals, or post-launch support pressure. Good conversion work should include staging, browser/device checks, CMS editing tests, and performance review before launch.
Design complexity affects the project more than the number of pages alone. A five-page site with custom layouts, animations, conditional content, and integrations can take more work than a larger site built from repeated section patterns.
The main complexity drivers are usually:
Simple designs can sometimes move quickly through plugins or builders. Complex designs need decisions about what should be hard-coded, editable, reusable, or simplified for performance. That planning stage is where many unrealistic estimates fail.
Figma to WordPress conversion can take from a few days for a simple page to several weeks for a custom website. The timeline depends less on the file format and more on scope: number of templates, responsive states, CMS requirements, integrations, QA depth, and revision process.
Plugins can shorten the first pass, but they do not remove QA, cleanup, content editing, or launch checks. Manual development takes longer upfront, but it can save time later if the site needs clean templates and predictable maintenance.
For agencies, timeline risk usually comes from missing handoff details: unclear mobile designs, undefined hover states, no content rules, late client changes, or assets that are not export-ready. A good estimate should separate development, QA, revisions, and launch support instead of giving one vague “conversion” number.
Agencies should use Figma to WordPress plugins only when the client project is simple, low-risk, and the agency accepts responsibility for cleanup. Plugins can help with prototypes, internal tests, landing pages, or budget-sensitive work where perfect code quality is not the main concern.
They are a weaker fit for client projects with strict brand standards, custom behavior, integrations, SEO expectations, or long-term maintenance needs. In those cases, the agency may save time at the start but lose it during QA, revisions, or support.
The agency risk is ownership. If the generated output breaks, performs badly, or is hard to edit, the client will not blame the plugin. They will blame the agency. That is why plugins should be treated as production shortcuts only after testing, not as a default delivery method.
Before handoff, prepare the design file, assets, behavior notes, and WordPress requirements, not just the final desktop mockup. Developers need enough context to build the site as a usable CMS, not only recreate screens.
Useful handoff items include:
For agency work, it also helps to define who approves deviations. Some pixel-level choices may need adjustment for responsiveness, performance, or editor usability.
Pixel-perfect conversion is not always necessary; functional fidelity is usually more important than copying every static design measurement. The finished WordPress site should preserve the intended layout, hierarchy, spacing logic, brand feel, and interactions, but it also has to work across real devices, browsers, content lengths, and editor use cases.
Pixel-level accuracy matters most for brand-critical pages, campaign landing pages, UI-heavy layouts, and designs already approved by a client. It matters less when exact spacing conflicts with responsive behavior, accessibility, loading speed, or CMS flexibility.
A practical target is “design-faithful and production-safe.” If matching the Figma file perfectly creates fragile code or hard-to-edit sections, the better decision may be to document the deviation and build the version that works reliably.
Yes, plugin-generated Figma to WordPress output can often be fixed later, but it is not always cheaper than rebuilding parts of it. Developers first need to understand how the plugin structured the page, theme, builder elements, CSS, scripts, and responsive rules. That discovery work can take time before any visible improvement happens.
Fixing makes sense when the site is small, the problems are isolated, and the generated structure is reasonably clean. Rebuilding is often better when the output is bloated, hard to edit, unstable, or tied too tightly to plugin-specific logic.
The practical question is: “Is the generated base worth preserving?” If the answer is no, trying to rescue it can become a slow patching cycle. In client work, that can cost more than starting with a cleaner WordPress implementation.
Discover how subscription website development helps deliver digital content, manage memberships, and create recurring revenue streams.
Learn the essentials of hotel website development to improve bookings, user experience, mobile performance, and guest engagement.

WPBakery vs Elementor comparison: features, usability, pricing, customization, and long-term maintainability to help choose the right WordPress page builder.